There’s something magical about the aroma of cookies baking in the oven, but when you add brown butter to the mix, it’s an entirely new level of incredible. I’ve spent years perfecting this recipe, and I’m excited to share my secrets for creating these irresistible brown butter chocolate chip cookies that’ll make your kitchen smell like heaven and your taste buds dance with joy.
What Makes These Cookies Special
The star of this recipe is the brown butter – a simple yet transformative ingredient that adds toffee-like notes and nutty complexity to these classic cookies. By taking the extra time to brown the butter, we’re creating layers of flavor that elevate these cookies from good to absolutely unforgettable.

Essential Ingredients
| Ingredient | Amount | Notes |
|---|---|---|
| Unsalted butter | 226g (1 cup) | European-style preferred for higher fat content |
| All-purpose flour | 280g (2¼ cups) | Measured by weight for accuracy |
| Light brown sugar | 200g (1 cup) | Packed firmly |
| Granulated sugar | 100g (½ cup) | Regular white sugar |
| Large eggs | 2 | Room temperature |
| Pure vanilla extract | 2 teaspoons | Never use imitation |
| Baking soda | 1 teaspoon | Fresh, not expired |
| Fine sea salt | 1 teaspoon | For dough |
| Flaky sea salt | For finishing | Optional but recommended |
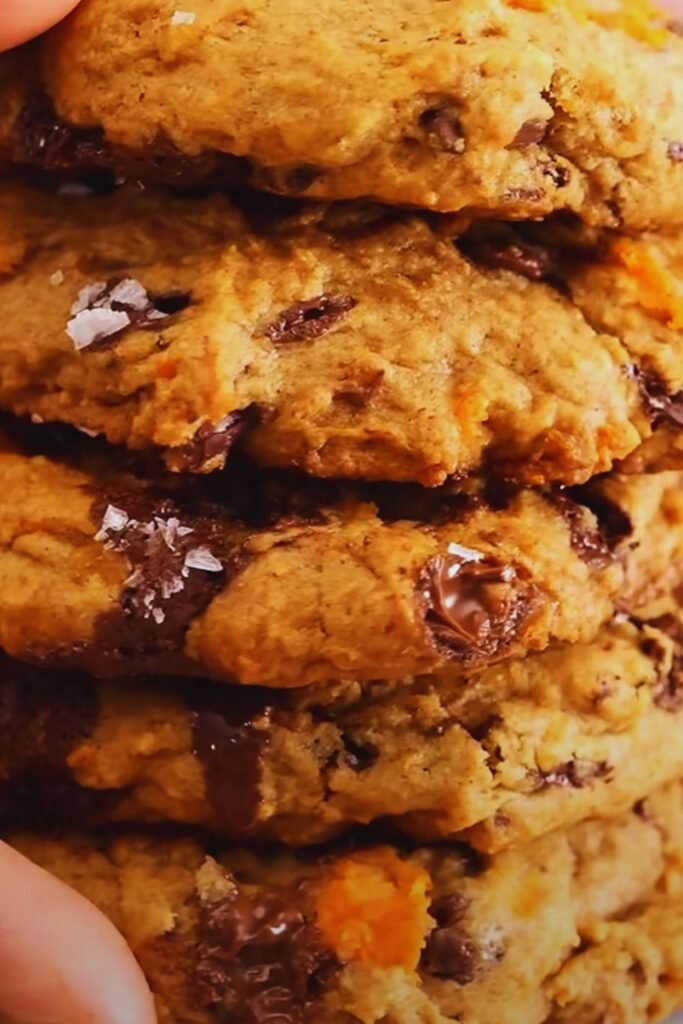
| Dark chocolate | 340g (12 oz) | 60-70% cacao, chopped |
Special Equipment Needed
| Equipment | Purpose |
|---|---|
| Light-colored saucepan | For browning butter (easier to see color changes) |
| Digital scale | For precise measurements |
| Stand mixer or hand mixer | For creaming butter and sugar |
| Baking sheets | Heavy-duty recommended |
| Parchment paper | For easy release |
| Cookie scoop | For uniform sizing |
The Brown Butter Process
Browning butter is a crucial step that requires attention and patience. Here’s my foolproof method:
- Cut the butter into even pieces and place in a light-colored saucepan
- Heat over medium, stirring occasionally
- Watch for these stages:
- Melting (2-3 minutes)
- Foaming (3-4 minutes)
- Golden bubbles (4-5 minutes)
- Nutty aroma and amber color (5-6 minutes)
- Remove from heat immediately when brown bits form
- Transfer to a heat-safe bowl
- Cool until solid but still soft (about 1 hour)
The Secret to Perfect Texture
I’ve discovered that the key to achieving that perfect chewy center with crispy edges lies in these crucial techniques:
- Temperature control:
- Room temperature eggs
- Properly cooled brown butter
- Chilled dough before baking
- Mixing method:
- Cream butter and sugars for 5 full minutes
- Beat in eggs one at a time
- Fold in flour gently
- Resting time:
- Minimum 24 hours in refrigerator
- Bring to cool room temperature before baking
Step-by-Step Instructions
- Brown the butter (follow process above)
- Once butter is cooled but soft:
- Beat with both sugars for 5 minutes until light and fluffy
- Scrape bowl frequently
- Add eggs one at a time, beating well after each
- Mix in vanilla extract
- Whisk together dry ingredients in separate bowl:
- Flour
- Baking soda
- Sea salt
- Fold dry ingredients into wet mixture
- Stir in chopped chocolate
- Cover and refrigerate 24-72 hours
- When ready to bake:
- Preheat oven to 350°F (175°C)
- Line baking sheets with parchment
- Scoop 3-tablespoon portions
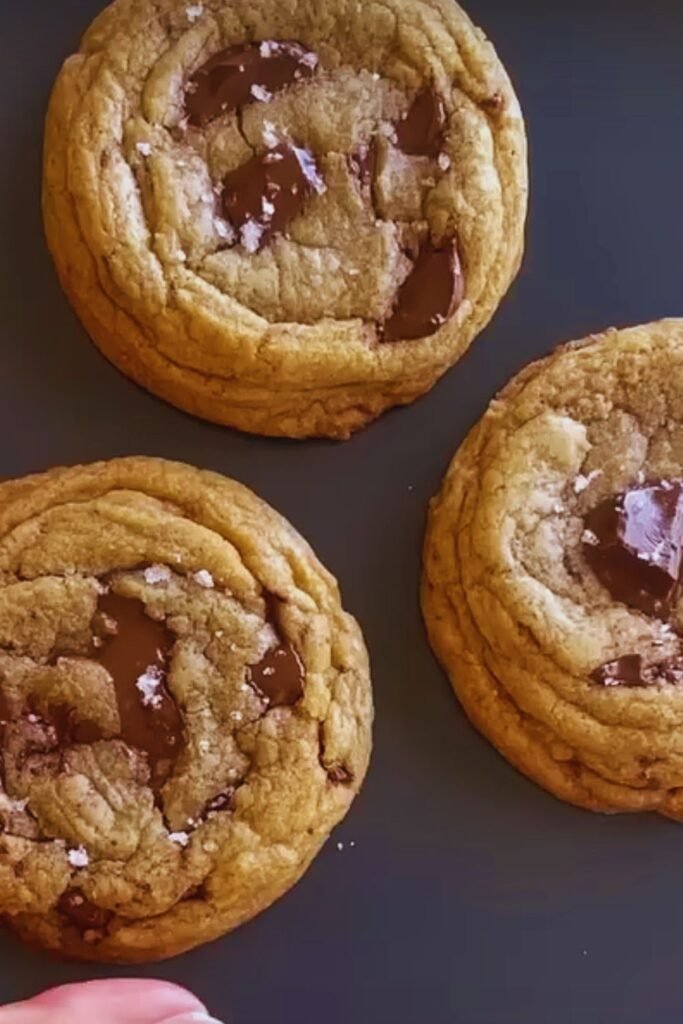
- Sprinkle with flaky salt
- Bake 12-14 minutes until golden brown edges
Pro Tips for Success
- Always use room temperature eggs for better incorporation
- Chop chocolate by hand for varied sizes and better distribution
- Use light-colored baking sheets to prevent over-browning
- Rotate pans halfway through baking
- Let cookies cool on baking sheets for 5 minutes before transferring
Storage and Make-Ahead Options
| Storage Method | Duration | Notes |
|---|---|---|
| Room temperature | 5 days | In airtight container |
| Refrigerator | 2 weeks | In airtight container |
| Freezer (baked) | 3 months | Double-wrapped |
| Freezer (dough) | 6 months | Portion before freezing |
Troubleshooting Guide
| Issue | Cause | Solution |
|---|---|---|
| Flat cookies | Warm butter or dough | Chill dough thoroughly |
| Too crispy | Overbaking | Remove when edges are just set |
| Not spreading | Too cold | Let dough warm slightly |
| Uneven baking | Hot spots in oven | Rotate pans halfway |
Serving Suggestions
These cookies are perfect with:
- Cold milk
- Hot coffee or tea
- Vanilla ice cream for cookie sandwiches
- Crumbled over yogurt parfaits
Frequently Asked Questions
Q: Can I skip the browning butter step?
While you can make regular chocolate chip cookies, the brown butter adds incredible depth of flavor that makes these cookies special. I highly recommend not skipping this step.
Q: Why do I need to chill the dough?
Chilling allows the flour to hydrate fully and the flavors to develop. This results in better texture and deeper flavor. Don’t skip this step!
Q: Can I use salted butter?
I prefer unsalted butter to control the salt content. If using salted butter, reduce the added salt by ¼ teaspoon.
Q: How do I know when the cookies are done?
The edges should be lightly golden brown, but the centers will look slightly underbaked. They’ll continue cooking on the hot baking sheet.
Q: Can I make smaller cookies?
Yes! Adjust baking time down to 9-11 minutes for 2-tablespoon portions.
Q: Why did my butter separate when browning?
This is normal! Just make sure to scrape all the browned bits (they’re full of flavor) and let it cool completely before using.
Recipe Variations
While I love the classic version, here are some tested variations:
| Variation | Changes to Make |
|---|---|
| Nutty | Add 1 cup toasted pecans |
| Extra Dark | Use all dark chocolate |
| Holiday | Add ¼ tsp cinnamon |
| Texture Boost | Add ½ cup toffee bits |
Remember, these cookies aren’t just a treat – they’re an experience. The extra steps and waiting time are absolutely worth it for cookies that will have everyone asking for the recipe. Happy baking!