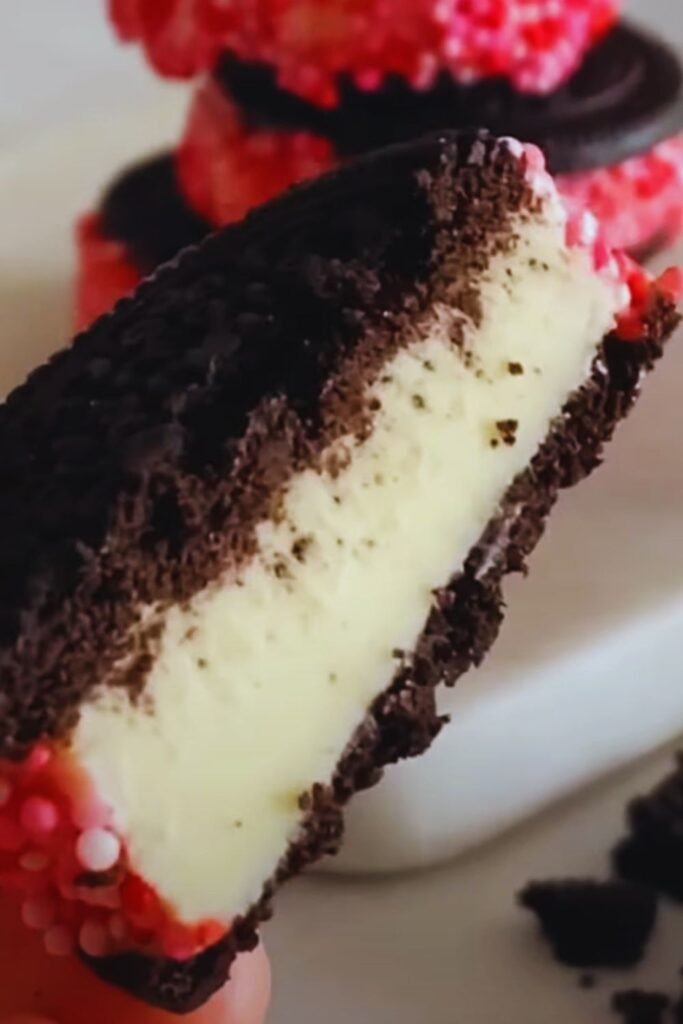
There’s something magical about biting into a perfectly chilled ice cream sandwich. The contrast between the crisp cookies and creamy filling creates a moment of pure bliss that takes me right back to childhood summers. Today, I’m excited to share my perfected recipe for homemade Oreo ice cream sandwiches that will elevate this classic treat to new heights.
Why Make Ice Cream Sandwiches at Home?
While store-bought versions certainly have their place, creating these treats from scratch opens up a world of possibilities. I’ve spent countless hours in my kitchen perfecting this recipe, and I can confidently say that the results are worth every minute. The homemade version allows you to control the quality of ingredients, adjust the sweetness to your liking, and create that perfect cookie-to-ice-cream ratio that commercial versions often miss.
Essential Equipment
Before we dive into the recipe, let’s ensure you have all the necessary tools:
- Stand mixer or hand mixer with paddle attachment
- Ice cream maker (or no-churn method alternative provided)
- Cookie sheets
- Parchment paper
- Rolling pin
- Round cookie cutter (3-inch diameter recommended)
- Plastic wrap
- Airtight container for storage
- Digital thermometer (optional but helpful)
Ingredients Breakdown
For the Chocolate Cookie Layers:
| Ingredient | Amount | Notes |
|---|---|---|
| Dutch-process cocoa powder | 1 cup | Premium quality for best results |
| All-purpose flour | 2 cups | Unbleached recommended |
| Unsalted butter | 1 cup | Room temperature |
| Granulated sugar | 1 cup | Regular white sugar |
| Egg | 1 large | Room temperature |
| Pure vanilla extract | 1 teaspoon | Not imitation |
| Salt | ½ teaspoon | Fine sea salt preferred |
| Baking powder | ½ teaspoon | Fresh for best results |
For the Oreo Ice Cream:
| Ingredient | Amount | Notes |
|---|---|---|
| Heavy cream | 2 cups | 36% fat content ideal |
| Whole milk | 1 cup | Don’t substitute low-fat |
| Granulated sugar | ¾ cup | Regular white sugar |
| Egg yolks | 5 large | Fresh, room temperature |
| Vanilla extract | 2 teaspoons | Pure, not imitation |
| Crushed Oreo cookies | 15 cookies | Regular, not Double Stuf |
| Salt | ¼ teaspoon | Fine sea salt |
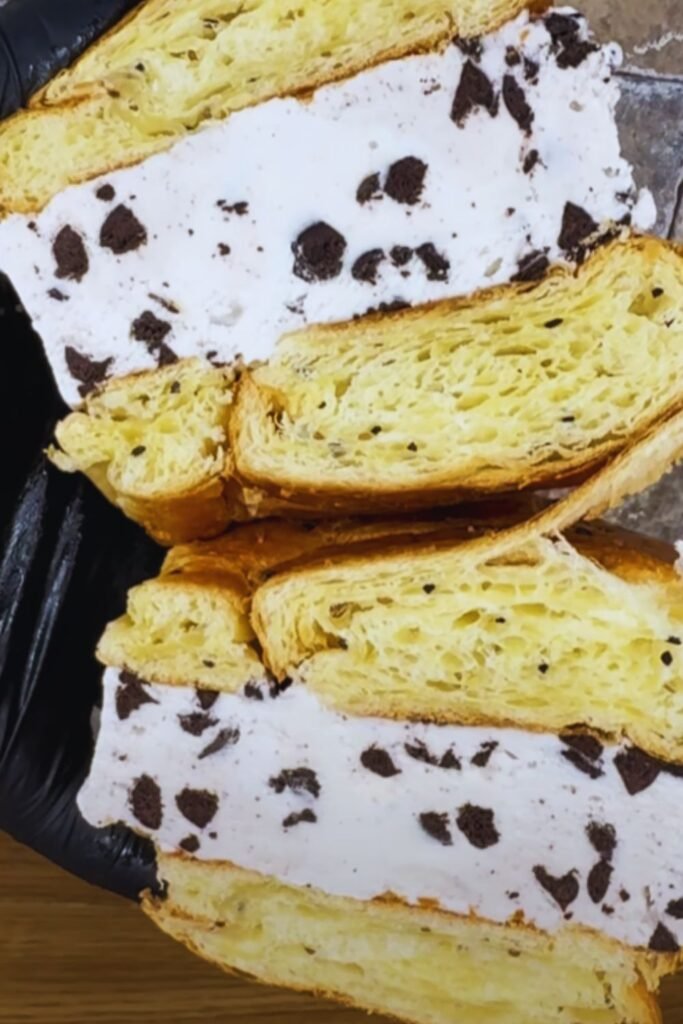
The Cookie Base: Creating the Perfect Chocolate Wafer
The key to exceptional ice cream sandwiches lies in the cookie base. Unlike regular cookies, we’re aiming for a texture that remains slightly soft even when frozen. Here’s my step-by-step process:
- Sift together the cocoa powder, flour, baking powder, and salt in a medium bowl. This ensures no lumps and even distribution.
- In your stand mixer bowl, cream the butter and sugar until light and fluffy (about 3-4 minutes). Don’t rush this step – proper aeration creates the ideal texture.
- Add the egg and vanilla extract, beating until well combined. Scrape down the sides of the bowl as needed.
- Gradually add the dry ingredients on low speed, mixing just until combined. Over-mixing will result in tough cookies.
- Divide the dough in half, shape into disks, and wrap in plastic. Chill for at least 2 hours or overnight.
Rolling and Cutting Tips:
- Roll the chilled dough between two sheets of parchment paper to prevent sticking
- Aim for ⅛ inch thickness – any thicker and they’ll be too hard when frozen
- Work quickly to keep the dough cold
- Re-chill if the dough becomes too soft

Creating the Perfect Oreo Ice Cream
The ice cream base is where we can really elevate this treat beyond store-bought versions. I’ve developed this recipe through countless iterations to achieve the perfect balance of creaminess and Oreo flavor.
Traditional Ice Cream Method:
- Heat milk, cream, and half the sugar in a saucepan until steaming (175°F).
- Meanwhile, whisk egg yolks with remaining sugar until pale and thickened.
- Slowly temper the hot cream mixture into the egg yolks, whisking constantly.
- Return mixture to saucepan and cook until thickened (180-185°F).
- Strain through a fine-mesh sieve into a clean bowl.
- Add vanilla extract and salt, then chill thoroughly (at least 4 hours).
- Churn according to your ice cream maker’s instructions.
- In the last 2 minutes of churning, add the crushed Oreo cookies.
No-Churn Alternative:
If you don’t have an ice cream maker, here’s my tested no-churn method:
- Whip 2 cups heavy cream until stiff peaks form.
- In a separate bowl, whisk together 1 can (14 oz) sweetened condensed milk, 1 teaspoon vanilla, and ¼ teaspoon salt.
- Fold whipped cream into condensed milk mixture.
- Gently fold in crushed Oreos.
- Freeze for at least 6 hours or overnight.
Assembly and Storage
The assembly process requires patience but is crucial for professional-looking results:
- Let the ice cream soften slightly at room temperature (about 5-10 minutes).
- Working quickly, spread about ½ cup ice cream onto one cookie.
- Top with another cookie and press gently.
- Wrap each sandwich individually in plastic wrap.
- Freeze immediately for at least 2 hours before serving.
Storage Tips:
- Keep sandwiches in an airtight container
- Layer with parchment paper between sandwiches
- Store for up to 1 month
- Allow 5 minutes at room temperature before serving
Troubleshooting Common Issues
| Problem | Cause | Solution |
|---|---|---|
| Cookies too hard when frozen | Dough rolled too thick | Roll to ⅛ inch thickness exactly |
| Ice cream too soft | Not frozen long enough | Freeze minimum 4 hours after assembly |
| Cookies cracking | Temperature too cold | Let stand 5 minutes before serving |
| Uneven ice cream distribution | Ice cream too firm during assembly | Let soften 5-10 minutes before spreading |
Serving Suggestions
These homemade Oreo ice cream sandwiches are perfect on their own, but here are some creative serving ideas:
- Roll edges in mini chocolate chips
- Drizzle with warm hot fudge sauce
- Serve with fresh berries
- Add a sprinkle of sea salt for contrast
- Pair with hot coffee or milk
Frequently Asked Questions
Q: Can I make these ahead for a party?
A: Absolutely! They can be made up to a month in advance and stored properly in the freezer.
Q: What if my cookies spread too much during baking?
A: This usually means the dough was too warm. Chill the cut cookies for 15 minutes before baking.
Q: Can I use different cookies for the crushed pieces in the ice cream?
A: Yes! Feel free to experiment with different sandwich cookies or even homemade versions.
Q: Why did my ice cream become icy?
A: This can happen if the base wasn’t chilled completely before churning or if air was introduced during storage. Make sure to follow the chilling times precisely.
Q: Can I make mini versions?
A: Absolutely! Use a smaller cookie cutter (about 2 inches) and adjust the baking time to 8-9 minutes.
Recipe Variations
While the classic version is fantastic, here are some creative twists I’ve developed:
- Mint Chocolate: Add ¼ teaspoon peppermint extract to the ice cream base
- Double Chocolate: Fold in mini chocolate chips along with the Oreo pieces
- Birthday Cake: Use golden Oreos and add rainbow sprinkles
- Peanut Butter: Swirl in ¼ cup warm peanut butter before adding the cookies
Remember, the key to success with this recipe is patience and attention to detail. Don’t rush the chilling steps, and work quickly when assembling. The result will be perfectly balanced ice cream sandwiches that are better than any store-bought version you’ve tried.
These homemade treats have become a staple at my summer gatherings, and I’m constantly asked for the recipe. Now you can create your own ice cream sandwich masterpieces at home. Happy baking!