Have you ever craved the complex flavors of Korean cuisine but felt intimidated by the seemingly complicated recipes? I certainly have. After countless trips to my favorite Korean restaurant and an obscene amount spent on takeout, I decided it was time to create my own quick version at home. What emerged was this ridiculously simple yet incredibly satisfying 10-Minute Korean Crispy Pork Belly Kimchi Bowl.
I’m not exaggerating when I say this dish has changed my weeknight dinner game completely. It delivers that perfect balance of spicy, savory, sweet, and tangy flavors that Korean food is famous for, but in just 10 minutes from start to finish. Yes, you read that right—10 minutes!
The beauty of this dish lies in its clever use of pre-cooked ingredients and pantry staples that come together to create something that tastes like it’s been simmering for hours. The star of the show is crispy pork belly, which provides rich, indulgent bites against the bright acidity of kimchi and the comforting backdrop of steamed rice.
So let’s dive into this culinary shortcut that doesn’t sacrifice an ounce of flavor. Whether you’re a Korean food enthusiast or a curious beginner, this recipe is about to become your new go-to for those busy weeknights when you want something exceptional without the wait.
Ingredients That Make Magic Happen
Before we jump into the cooking process, let’s talk about what makes this dish so special. Each ingredient plays a crucial role in building those authentic Korean flavors without requiring hours in the kitchen.
Essential Ingredients
- Pre-cooked pork belly slices – 8 oz (about 225g)
- Kimchi – 1 cup, chopped
- Cooked rice – 2 cups (white or brown)
- Gochujang (Korean chili paste) – 2 tablespoons
- Soy sauce – 1 tablespoon
- Honey or maple syrup – 2 teaspoons
- Sesame oil – 1 teaspoon
- Garlic – 2 cloves, minced
- Green onions – 2, sliced
- Sesame seeds – 1 tablespoon
- Vegetable oil – 1 tablespoon
Optional Enhancements
- Soft-boiled egg – 2
- Cucumber – ½, thinly sliced
- Radish – 4, thinly sliced
- Avocado – ½, sliced
- Nori sheets – 2, cut into strips
- Gochugaru (Korean chili flakes) – to taste
I always keep pre-cooked pork belly on hand—you can find it at many Asian markets or even mainstream grocery stores these days. If you can’t find pre-cooked pork belly, thick-cut bacon makes a decent substitute, though the texture will be different.
As for the kimchi, quality matters here. Look for a brand that contains traditional ingredients without lots of preservatives. The natural fermentation gives it that distinctive tang that brings this dish to life.
Kitchen Tools You’ll Need
One of the reasons this dish comes together so quickly is that it requires minimal equipment:
- Non-stick skillet or wok
- Cutting board and knife
- Mixing bowl for sauce
- Measuring spoons
- Tongs for flipping pork belly
That’s it! No special equipment required, which makes this perfect for even the most basically equipped kitchen.
The 10-Minute Method That Works Every Time
Now let’s get to the heart of this recipe—the cooking method that delivers restaurant-quality flavors in just 10 minutes.

Step 1: Crisp Up That Pork Belly (3 minutes)
- Heat your skillet over medium-high heat and add vegetable oil
- Place pork belly slices in the hot pan, making sure not to overcrowd
- Cook for 2-3 minutes until the edges become golden and crispy
- Flip occasionally to ensure even crisping
The key here is to start with pre-cooked pork belly. This isn’t the time to begin with raw pork belly, which would take much longer to render and crisp. The goal is to heat it through while adding that irresistible crispy exterior.
I’ve found that slicing the pork belly about ¼-inch thick gives the perfect ratio of crispy exterior to tender, melt-in-your-mouth interior. If your slices are too thick, they won’t crisp up properly in the short cooking time.
Step 2: Create the Quick Sauce (1 minute)
While the pork belly is crisping, quickly whisk together:
- Gochujang
- Soy sauce
- Honey or maple syrup
- Sesame oil
- Minced garlic
This sauce is the flavor bomb that brings everything together. The gochujang provides that distinctive Korean heat and depth, while the honey balances it with a touch of sweetness. Sesame oil adds its nutty complexity, and the fresh garlic punches up the aromatics.
If you’re sensitive to heat, start with just 1 tablespoon of gochujang and adjust to taste. Remember that the rice will help temper the spiciness when everything is combined.
Step 3: Combine Everything (2 minutes)
- Once the pork belly is crispy, reduce heat to medium
- Add the kimchi to the pan and stir-fry for 30 seconds
- Pour in the sauce and toss everything together
- Cook for another 1-2 minutes until everything is well-coated and bubbling slightly
The brief cooking time for the kimchi is intentional—we want to warm it through and let it mingle with the pork fat, but not cook it so long that it loses its signature fermented tang. This balance of hot, crispy pork and barely warmed kimchi creates a wonderful contrast of temperatures and textures.
Step 4: Assemble Your Bowls (4 minutes)
- Divide the warm rice between two bowls
- Top with the pork belly and kimchi mixture
- Garnish with sliced green onions and sesame seeds
- Add any optional toppings you desire
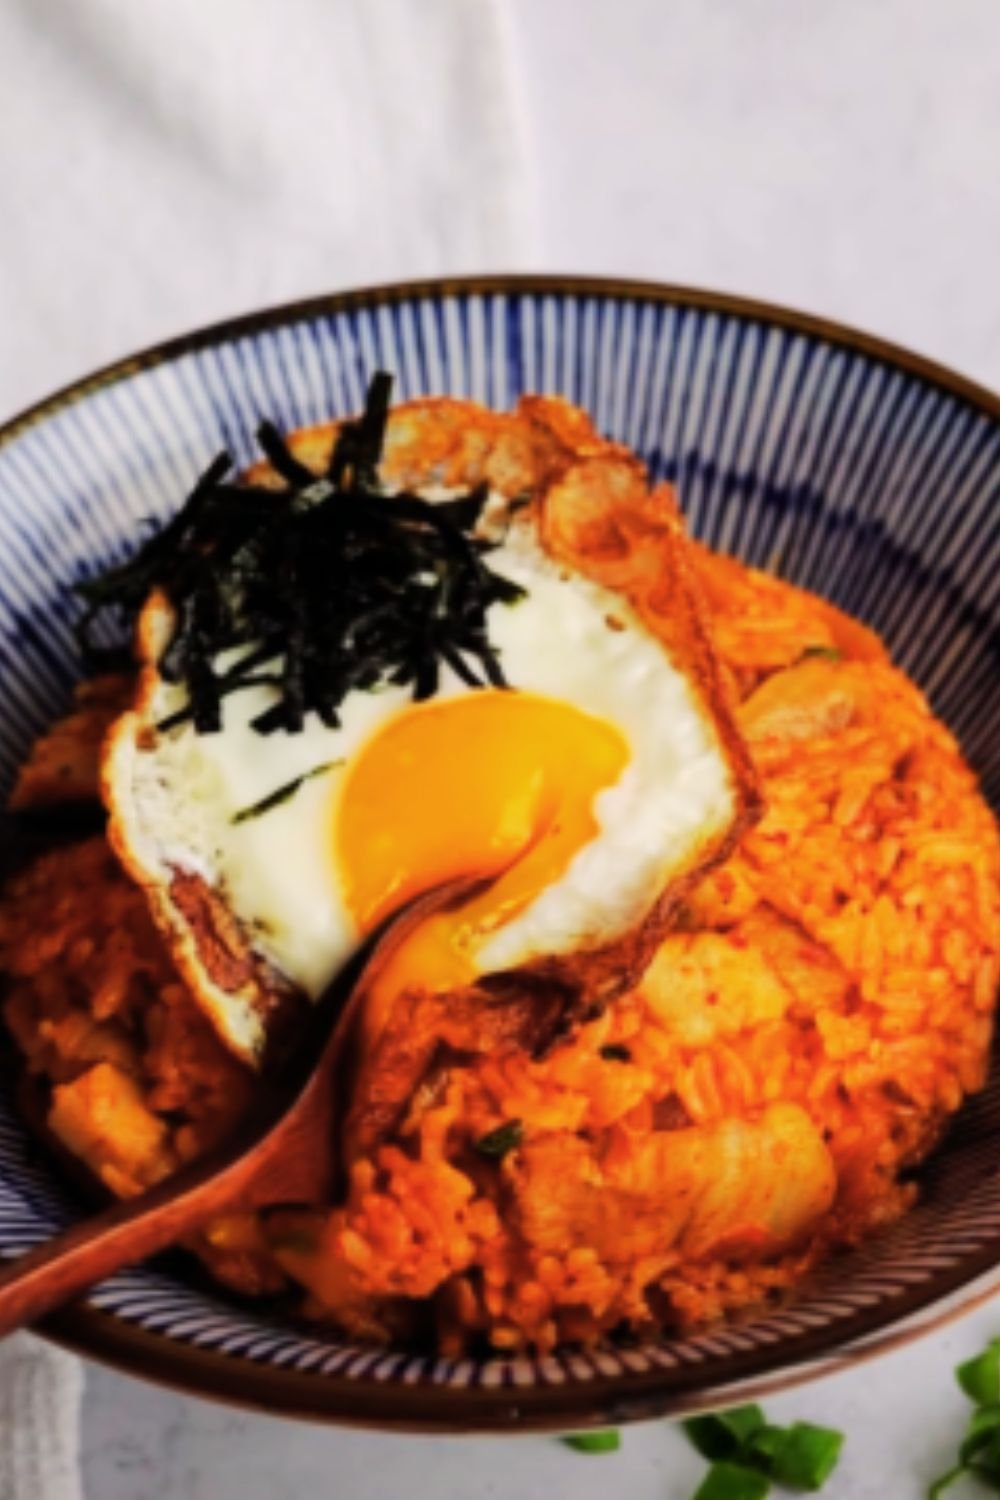
I like to create these bowls with the rice as a base and the pork belly mixture prominently on top, with optional ingredients arranged artfully around the edges. This not only makes for a beautiful presentation but also allows everyone to mix things exactly how they prefer.
If you’re adding a soft-boiled egg (which I highly recommend), place it gently on top and cut into it just before eating so the golden yolk creates an additional sauce that enriches the entire dish.
Variations to Keep Things Interesting
One of the reasons I love this recipe is how easily it can be adapted. Here are some of my favorite variations:
Protein Swaps
| Protein | Prep Method | Cook Time | Flavor Profile |
|---|---|---|---|
| Chicken thighs | Slice into strips | 4-5 minutes | Lighter, absorbs sauce well |
| Tofu | Press and cube | 3-4 minutes | Vegetarian, takes on marinade flavors |
| Shrimp | Peel and devein | 2-3 minutes | Sweet, quick-cooking seafood option |
| Ground pork | Break up with spatula | 3-4 minutes | Economical, absorbs flavors thoroughly |
| Beef ribeye | Thinly slice | 2-3 minutes | Rich, luxurious alternative |
Rice Alternatives
| Base | Prep Time | Texture | Nutritional Benefits |
|---|---|---|---|
| Cauliflower rice | 5 minutes | Light, fluffy | Low-carb, high fiber |
| Quinoa | 15 minutes | Slightly chewy | High protein, complete amino acids |
| Soba noodles | 4 minutes | Slippery, tender | Buckwheat provides minerals |
| Mixed grains | Varies | Hearty, diverse | Complex carbs, varied nutrients |
| Lettuce cups | 1 minute | Crisp, fresh | Ultra low-calorie, refreshing |
Seasonal Adaptations
| Season | Featured Ingredients | Special Touches |
|---|---|---|
| Spring | Fresh pea shoots, asparagus | Lighter sauce, more herbs |
| Summer | Cucumber, zucchini, corn | Cold rice option, extra vinegar |
| Fall | Mushrooms, sweet potato | Slightly thicker sauce, warming spices |
| Winter | Root vegetables, kale | Hearty stock addition, more gochujang |

Nutritional Powerhouse
This dish isn’t just delicious—it’s nutritionally impressive as well. Let’s break down the benefits of some key ingredients:
Kimchi Benefits
Kimchi isn’t just flavorful; it’s a nutritional powerhouse that brings several health benefits to this dish:
- Probiotics: As a fermented food, kimchi contains beneficial bacteria that support gut health
- Vitamin C: The fermentation process actually increases the vitamin C content
- Vitamin A: The cabbage and peppers provide this important antioxidant
- Fiber: Supports digestive health and helps you feel full longer
- Anti-inflammatory compounds: May help reduce chronic inflammation
Pork Belly Nutrition
While pork belly is indeed indulgent, it’s not all bad news nutritionally:
- Complete protein: Contains all essential amino acids
- B vitamins: Particularly rich in thiamine, which supports energy metabolism
- Selenium: An important mineral that supports thyroid function
- Monounsaturated fats: Similar to those found in olive oil
When enjoyed in moderation, as in this recipe where we’re using just 4 ounces per serving, pork belly can be part of a balanced diet.
Detailed Nutritional Breakdown
For those who track their nutrition, here’s a detailed breakdown of this dish per serving:
| Nutrient | Amount | % Daily Value |
|---|---|---|
| Calories | 680 | – |
| Protein | 28g | 56% |
| Carbohydrates | 58g | 19% |
| Dietary Fiber | 6g | 24% |
| Sugars | 10g | – |
| Fat | 38g | 58% |
| Saturated Fat | 12g | 60% |
| Monounsaturated Fat | 18g | – |
| Polyunsaturated Fat | 8g | – |
| Cholesterol | 65mg | 22% |
| Sodium | 980mg | 41% |
| Potassium | 540mg | 15% |
| Vitamin A | 1200IU | 24% |
| Vitamin C | 35mg | 58% |
| Calcium | 120mg | 12% |
| Iron | 3.5mg | 19% |
*Values are approximate and may vary based on specific ingredients used.
Make-Ahead and Storage Tips
While this dish comes together in just 10 minutes, there are ways to make it even more convenient:
Prep-Ahead Components
- Sauce: Can be mixed and stored in an airtight container in the refrigerator for up to 1 week
- Rice: Can be cooked and refrigerated for up to 3 days, or frozen for up to 1 month
- Toppings: Green onions, cucumbers, and other vegetable toppings can be sliced and stored separately for 2-3 days
Storage Guidelines
| Component | Refrigerator | Freezer | Reheating Method |
|---|---|---|---|
| Complete dish | 2-3 days | Not recommended | Microwave 2 minutes or skillet 3-4 minutes |
| Pork belly only | 3-4 days | 1 month | Skillet until crispy, 2-3 minutes |
| Rice only | 3-4 days | 2 months | Microwave with splash of water |
| Sauce only | 7-10 days | 1 month | Thaw in refrigerator overnight |
I find that the leftovers, while still delicious, lose some of that magical texture contrast that makes the fresh version so special. The pork belly won’t be quite as crispy, and the kimchi flavor melds more completely with everything else. Still tasty, just different!
Serving Suggestions
To elevate your meal experience even further, here are some complementary dishes and beverages that pair beautifully with these bowls:

Side Dishes
- Quick cucumber salad: Sliced cucumbers tossed with rice vinegar, a pinch of sugar, and sesame seeds
- Miso soup: A light, umami-rich starter that prepares the palate
- Korean vegetable pancakes (Pajeon): Crispy, savory pancakes that complement the bowls perfectly
- Steamed edamame: Simple, protein-rich finger food to start the meal
Beverage Pairings
- Barley tea (Boricha): A roasted, caffeine-free tea that aids digestion
- Sparkling water with citrus: The effervescence helps cut through the richness
- Korean plum tea (Maesil-cha): Sweet-tart flavor that balances the spicy elements
- Sparkling Yuzu drink: Refreshing citrus notes complement the bold flavors
Dessert Options
After such a flavorful main course, I recommend something light and refreshing for dessert:
- Fresh fruit plate: Particularly Asian pears or persimmons
- Sweet rice cake (Injeolmi): Chewy rice cakes dusted with soybean powder
- Cinnamon ginger tea: Soothing digestive properties and natural sweetness
- Chilled silken tofu with honey: A light, protein-rich sweet finish
The Cultural Context
While this 10-minute version is certainly streamlined, it’s worth appreciating the rich cultural history behind the elements of this dish.
Pork belly has been a staple in Korean cuisine for centuries, traditionally slow-cooked and often used in special occasion dishes. Kimchi, of course, is Korea’s national dish—a fermented vegetable preparation with hundreds of variations that has sustained the Korean people through harsh winters for generations.
What we’re doing here is honoring these traditions while adapting them to modern constraints. It’s a respectful shortcut that maintains the soul of the dish while making it accessible for busy weeknight cooking.
Common Questions About This Recipe
After sharing this recipe with friends and family, here are the most frequently asked questions I receive:
Q: Can I use fresh pork belly instead of pre-cooked?
Fresh pork belly requires much longer cooking—typically 1-2 hours to render the fat and tenderize the meat. For this 10-minute recipe, pre-cooked is essential. If you only have fresh, consider cooking it separately using a slow-roast method, then refrigerating and using it for this quick recipe later.
Q: Is there a vegetarian alternative that works well?
Absolutely! Extra-firm tofu works beautifully. Press it well to remove excess moisture, cut into ½-inch slices, and pan-fry until crispy before proceeding with the recipe. Tempeh is another excellent option that provides a hearty texture and absorbs the flavors wonderfully.
Q: How spicy is this dish, and can I adjust the heat level?
The spice level is moderate as written. To make it milder, reduce the gochujang to 1 tablespoon or even 2 teaspoons. For more heat, add gochugaru (Korean chili flakes) or even a small amount of fresh minced chili. The beauty of making this at home is that you can perfectly calibrate the spice level to your preference.
Q: My pork belly isn’t getting crispy. What am I doing wrong?
This usually happens for one of three reasons: 1) The pan isn’t hot enough before adding the pork, 2) The pork slices are too wet (pat them dry with paper towels first), or 3) You’re overcrowding the pan. Try cooking in batches if needed to allow proper crisping.
Q: Can I make this ahead for meal prep?
You can prepare all components ahead of time, but I recommend keeping them separate until serving time. Store the crisped pork belly, sauce, and rice separately, then quickly reheat and assemble when ready to eat. This preserves the contrasting textures that make this dish special.
Q: What’s the best type of kimchi to use?
Traditional napa cabbage kimchi works best, and I prefer one that’s moderately aged (about 1-2 weeks old) for the perfect balance of fresh and fermented flavors. That said, radish kimchi (kkakdugi) also works wonderfully and adds a different textural element. Avoid overly aged kimchi (unless you love that stronger flavor) as it can overwhelm the other components.
Q: Is there a low-carb version of this recipe?
Yes! Replace the rice with cauliflower rice and reduce or substitute the honey with a low-carb sweetener like monkfruit or erythritol. The rest of the dish is naturally low in carbs while still delivering all the flavor.

Why This Recipe Works: The Science Behind the Magic
As someone who’s fascinated by food science, I’ve analyzed why this quick version works so well despite bypassing traditional long cooking methods:
The Maillard Reaction
The quick high-heat cooking of the pre-cooked pork belly triggers the Maillard reaction—a chemical reaction between amino acids and reducing sugars that gives browned food its distinctive flavor. This creates depth in minutes rather than hours.
Layered Acidity
Kimchi provides multiple forms of acidity through its fermentation process. The lactic acid from fermentation, acetic acid from any vinegar used, and citric acid from any citrus elements create a complex tang that would typically require long marinating times.
Fat as a Flavor Carrier
The rendered fat from the pork belly acts as a powerful flavor carrier, quickly picking up and distributing the complex flavors from the sauce and kimchi throughout the dish. This is why even a brief cooking time results in such cohesive flavor.
Umami Synergy
The combination of fermented kimchi, soy sauce, and pork creates what scientists call “umami synergy”—where these ingredients enhance each other’s savory qualities far beyond what any single ingredient could contribute alone.
Final Thoughts: Why This Dish Deserves a Spot in Your Rotation
I created this recipe out of necessity during a particularly hectic period when I craved something deeply satisfying but had minimal time to cook. What began as a compromise has become one of my most-made dishes, proving that quick doesn’t have to mean boring or basic.
What I love most about this bowl is how it delivers complexity through smart ingredient choices rather than lengthy techniques. It’s a perfect example of how modern cooking can honor traditions while adapting to contemporary needs.
Whether you’re a Korean food enthusiast looking for a quick fix or a curious cook wanting to explore these flavors for the first time, this 10-Minute Korean Crispy Pork Belly Kimchi Bowl delivers restaurant-worthy satisfaction in home-kitchen time.
Give it a try, make it your own, and I’d love to hear how it becomes part of your cooking repertoire too!
Q&A Section
Q: Can I make this dish completely from scratch if I have more time?
Absolutely! If you have more time, you can make your own kimchi (though it needs 3-5 days to ferment properly) and slow-roast fresh pork belly with a simple rub of salt, pepper, and a touch of sugar for about 2 hours at 300°F until tender, then slice and crisp it up when ready to use. The homemade approach certainly adds another dimension of flavor.
Q: How authentic is this quick version compared to traditional Korean dishes?
This is definitely a streamlined, adapted version designed for quick cooking. Traditional Korean dishes involving pork belly, like bossam (boiled pork wraps) or samgyeopsal (grilled pork belly), involve different cooking methods and serving styles. That said, this recipe honors the flavor profiles and key ingredients of Korean cuisine while adapting the techniques for speed.
Q: What’s the best way to adjust this recipe for a family of four?
Simply double all the ingredients! However, when crisping the pork belly, you’ll definitely want to work in batches to avoid overcrowding the pan. You might also consider setting up a “bowl bar” where family members can assemble their own bowls with their preferred amount of sauce and toppings.
Q: How can I make this dish healthier without sacrificing flavor?
Try these modifications: Use leaner pork loin instead of pork belly (though you’ll need to add a bit more oil to the pan), increase the vegetable toppings, use brown rice or cauliflower rice instead of white rice, and reduce the honey in the sauce by half. These changes will lower the calorie and fat content while maintaining the essential flavor profile.